
A significant issue with online (and hybrid!) teaching is how to make sure that students are actively learning while going through class material online. Let’s face it–multitasking is simply a fact of life now, where screens are our gateway to work/learning/socializing, and where at any given time we might have two or three screens in front of us at once. Teaching requires us to meet students where they are, in order to help them progress. In these multiscreen multitasking days, meeting students where they are means we have to think creatively about keeping their attention in the face of all these distractions. Active learning through interactive lessons becomes even more important.
This article will walk through two methods (Google forms and Canvas) for creating interactive lessons for hybrid and online classes, as well as my assessment of each of the methods, and the reasons that I ended up building lessons directly in Canvas. For both methods, I used a combination of short (2-5 min) videos and questions students had to answer before moving on to the next short video lesson.
Google forms
The first method, Google forms, is available to all teachers (and everyone with a Google account). Since not all schools have Canvas, I’ll start here.

The first thing to notice about Google forms is that you can embed videos directly into questions. That means that you can introduce the lesson with a prefatory video, like I’ve done here, describing the objectives and learning outcomes for the lesson. Students watch the video from inside the Google form, lessening the chance that you will lose some of them if you link them to an additional site like YouTube. You can then ask as many questions as you want about the video they just watched, add more short videos, come up with extra questions, etc: wash, rinse, repeat as many times as necessary to fulfill your objectives.
In all, this lesson had four sections: a brief written introduction with objectives; a video that presented the new information; a set of supporting questions so that students could apply their new knowledge; and then also feedback on those questions, which students were able to view immediately, before I even saw their answers to the questions. I knew from prior experience some of the concepts that would confuse them, so I reinforced those concepts again in a second video, which also gave the answers to some of the questions I had asked them. The goal was to have them attempt to answer the questions before they got the answers. Individual feedback on their answers would come later, in the grading period, but everyone got feedback immediately in the fourth part of this lesson.

The advantages here: Google forms are free; the learning curve is super easy if you are familiar with Google products; there’s a good amount of flexibility in how you organize the form; students can see the entire lesson in one online environment; and the answers are also aggregated in a spreadsheet, which can be helpful to see at a glance where students’ confusion seems to lie.
The disadvantages of the Google form interactive lesson: You can only embed YouTube videos, so if you record them in another app (screencastify, Kaltura, screencastomatic, etc), you have to first upload them to YouTube and then embed them in the form. Also, you can’t maximize the video window size from inside the lesson, which can mean that the lesson has some accessibility issues, because the videos remain smaller and the captions are tiny. You also can’t hyperlink out from Google forms; links have to be spelled out within the form, which is ugly. In the end, because of the video size limitations and related accessibility concerns, I decided that Google forms was not going to be my preferred method for creating interactive lessons.
Canvas quizzes
That left me with my campus LMS, Canvas.
Canvas works a lot like a website built on a platform like WordPress, where you have pages for a wide variety of different items (assignments, modules, syllabus, etc) – pages are sort of the building blocks of the site. And then the instructor organizes the pages into a format that makes sense for the students. So if you imagine a Canvas page sort of like a Google doc, you can do a lot with that page, embedding videos and interspersing them with text, like this page here (note: the videos on the page will not work; this is only an example).
However, remember that issue of short attention spans? If you have a complex lesson that you’re leading your students through (e.g. how to edit a paper; how to write an annotated bibliography; how to conduct research on the library website), you are likely to lose people partway through your doc. That’s where something like a Google form, or as I’ll show below, a Canvas quiz, can be helpful, because it effectively requires students to keep clicking through, to keep turning virtual bookleaves, in order to complete the lesson. There is less attention fatigue.
So to put together an active learning exercise that holds students’ attention, I recommend Canvas quizzes.
Like the Google form example above, quizzes can be used to construct a series of videos and supporting questions, answers to the questions, etc., and therefore they offer a chance for active learning, immediate generalized assessment, and individualized assessment when you look at the results later. Quizzes can be inserted into modules (the usual grouping category for Canvas pages, the organizing principle that students will see), and so they seem to be an appropriate element in the module hierarchy for what I wanted these lessons to do.
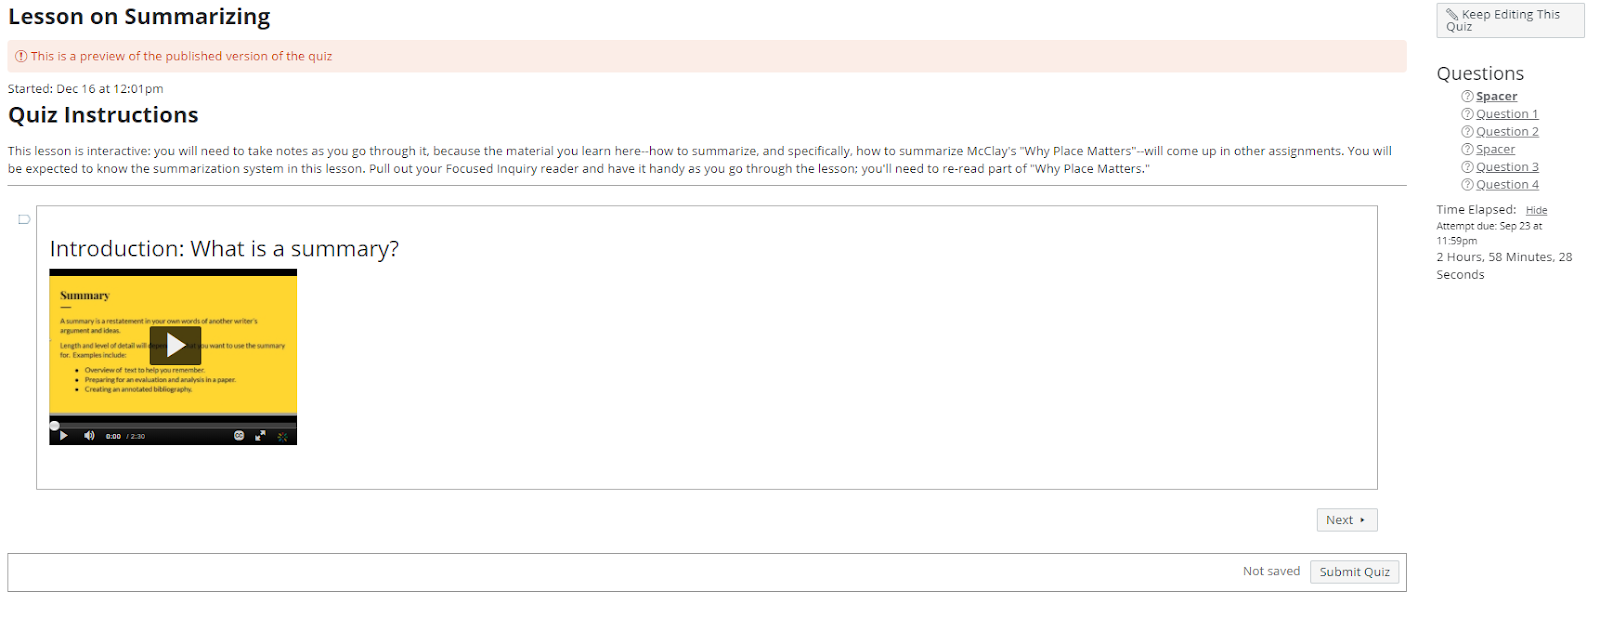
Here is what a quiz (which I call a “lesson” because it seems friendlier??) looks like inserted into a Canvas module:

Similar to Google forms, Canvas quizzes have flexibility in how you organize the questions, and you can embed videos. Each question goes into a sort of virtual bookleaf that students have to turn (by hitting “next”) to get to the next item you want them to see. You can also embed a video in a ‘leaf’ without asking a question.
Here’s what the same lesson from above looks like in editing mode in Canvas. The first ‘leaf’ is what Canvas calls a spacer, which you see over on the list of elements in the quiz on the right side of the image. Spacer just means that it’s an element that students have to click through, but it doesn’t have a question associated with it. You make spacers by selecting “Text (no question)” in question type when you are building the quiz. So here, I’m asking students just to watch this video and then move to the next element, which has the first actual question of the lesson.
In this first question below, I am asking students to apply information that I presented in the first video above and in this video here. You can see how their answers are integrated into the quiz, meaning that (hopefully!) they have to keep paying attention as they go through the elements of the lesson. You can also change up what the different ‘leaves’ or elements of the lesson look like, again, to help make sure students are paying attention.

This next frame shows question 2, where I want a short paragraph based on the information students received in the first two videos.

The rest of this lesson looks basically like those images above, hopefully they give you an idea of how Canvas quizzes can help you create an active-learning lesson that holds students’ attention!
The advantages of using Canvas quizzes to craft interactive lessons include the fact that you can embed basically any hosted video you want to (unlike Google forms), so I use my school’s Kaltura account to record screencasts and link to those videos. Students also stay within the Canvas framework, so you’re not asking them to switch to another app or tab, and they can maximize the video window within the app, making reading captions far easier than in Google forms. Grading is also integrated and made simpler than if you had to grade the spreadsheet created by the Google form.
The disadvantage of this method for creating interactive lessons is that I think of Canvas as kind of “sticky” – developing material for Canvas means that it’s stuck in Canvas, and you can’t easily transport it if you, for example, switch jobs to a school with a different LMS. The only workaround I have here is that I create my videos using Google slides as a sort of preliminary photo board, complete with the slides in the videos and also with the quiz questions written out. That way, I still have a record of the material that I used to put the lesson together. I also put the slides into a “lesson archive” so that if students need to re-examine the material, they have the whole lesson in one place instead of clicking through the lesson again.

In the end, I found Canvas quizzes to be a better method for creating interactive lessons, because of their integration in the LMS, because I didn’t want to use the additional step of posting my videos to YouTube, and because students can maximize the videos and read the closed captioning if necessary, thereby improving the accessibility of the lesson.


